ACCOUNTING/FINANCE SIDE
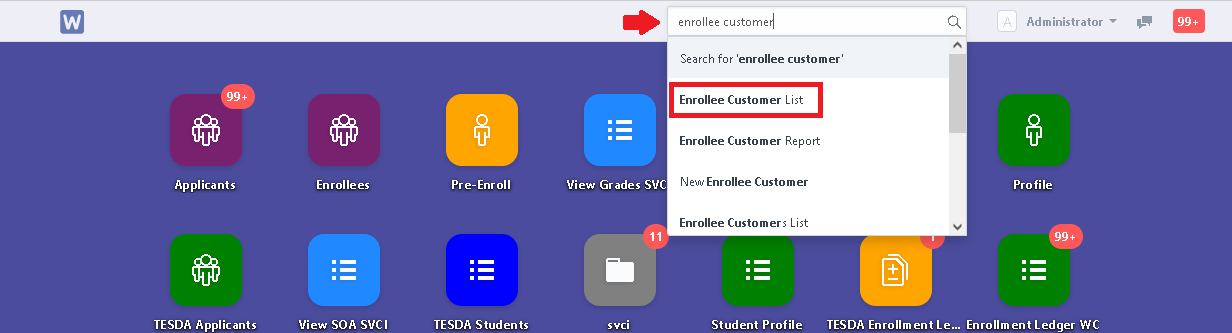
Step 1. In search bar, search for "Enrollee Customer List" or click the following icon.

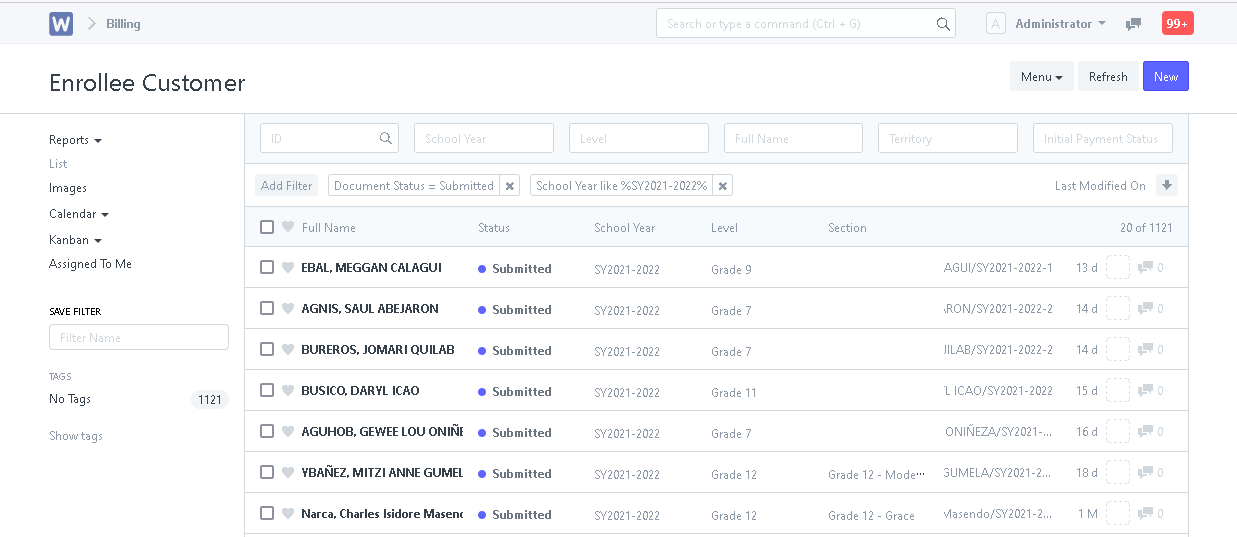
Step 2. Choose a student's enrollee customer entry of the current school year (School year and semester for SHS). (Note: the entry must be a Draft or Submitted)
Step 3. Click the "Withdraw" button and click "Yes".
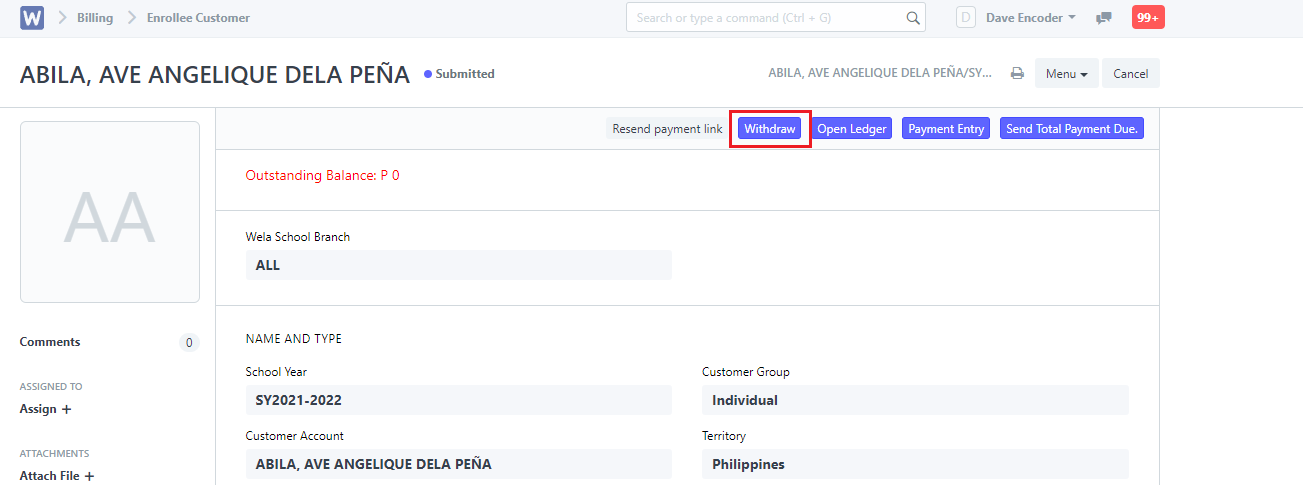
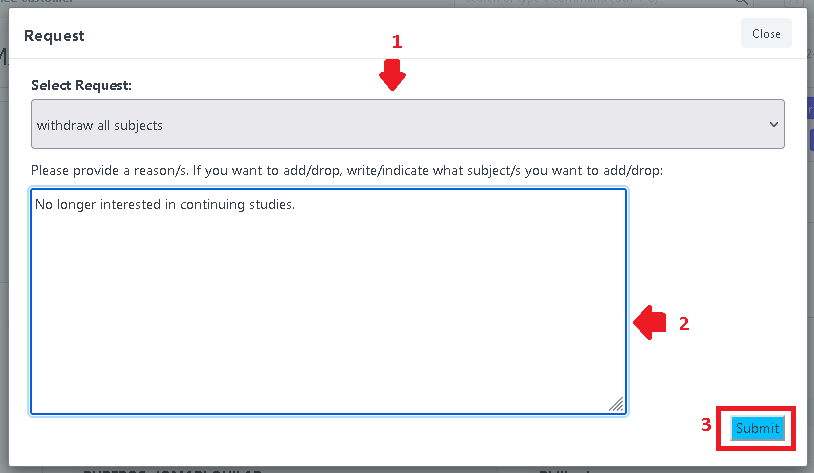
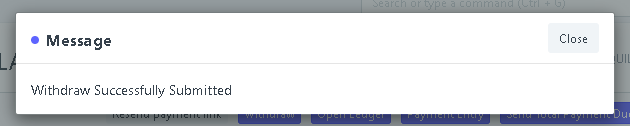
Step 4. System will prompt user to select a request. Select "Withdraw all subject" then provide the reason for the withdrawal. Then click "Submit".
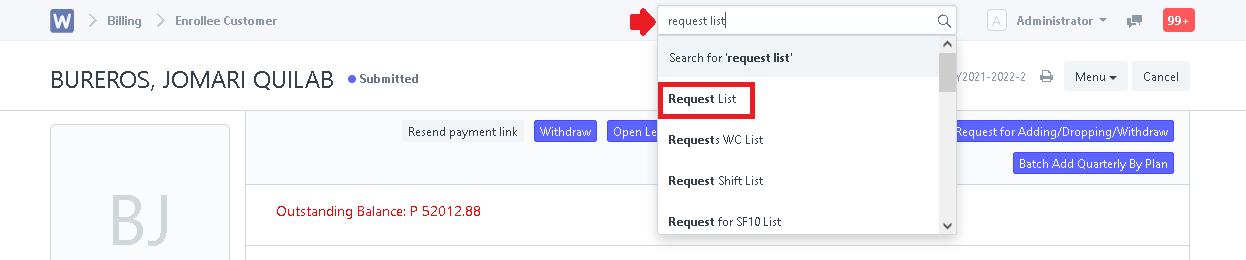
Step 5. In search bar, search for "Request List".
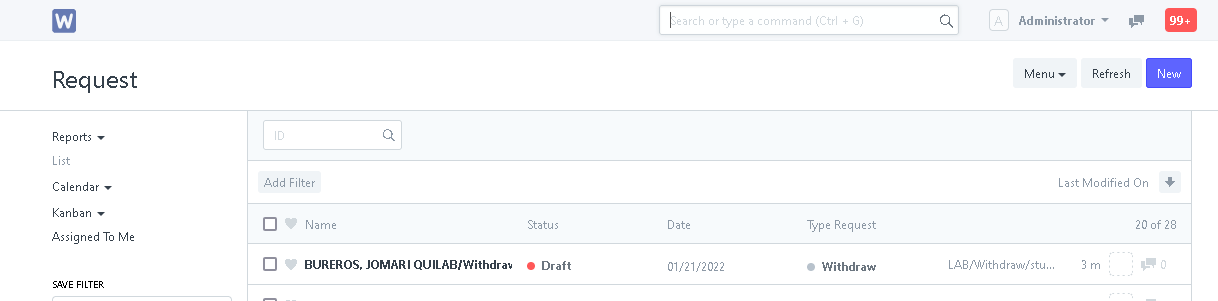
Step 6. Open the drafted request of the student's withdrawal.
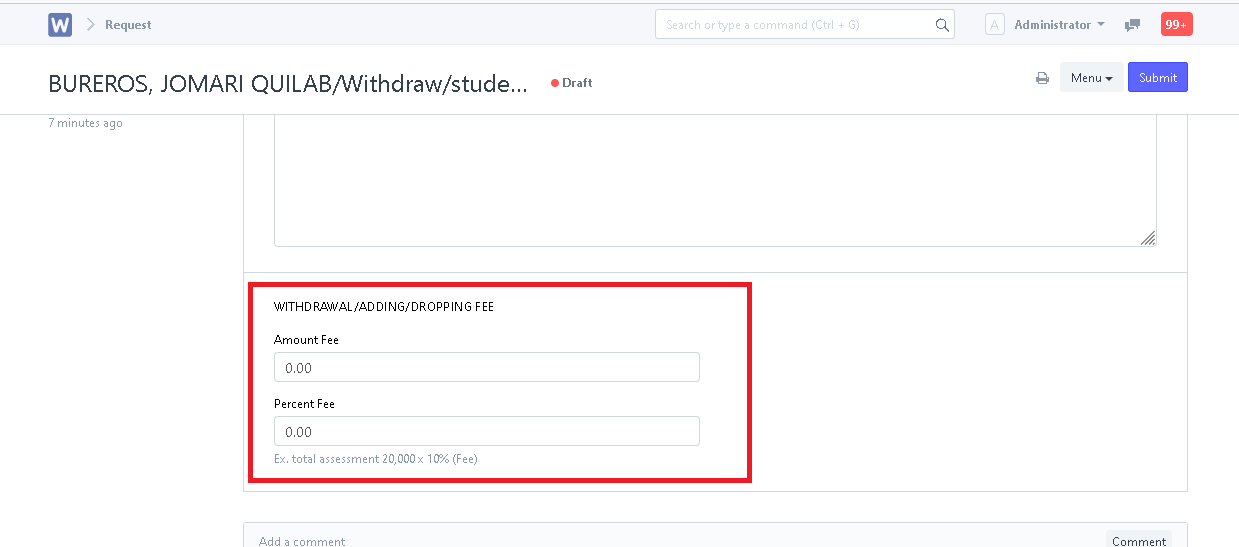
Step 7. Evaluate the request then input the necessary fees to be charged.
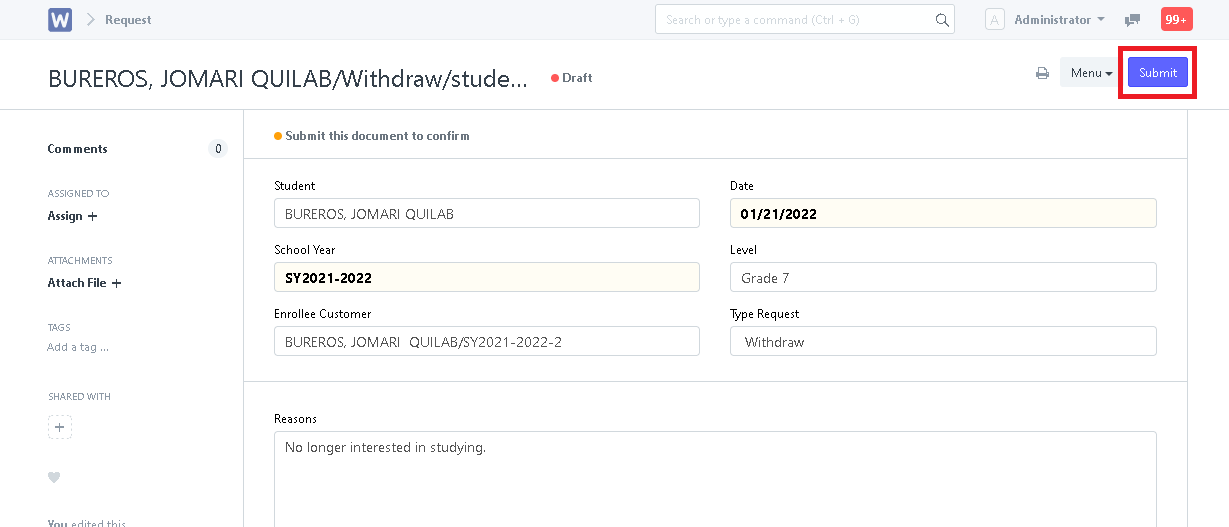
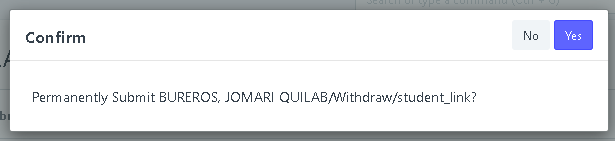
Step 8. After evaluation, click "Submit" to approve the withdrawal. System will then prompt the user to confirm the submission. Click "Yes" to proceed.

REGISTRAR SIDE
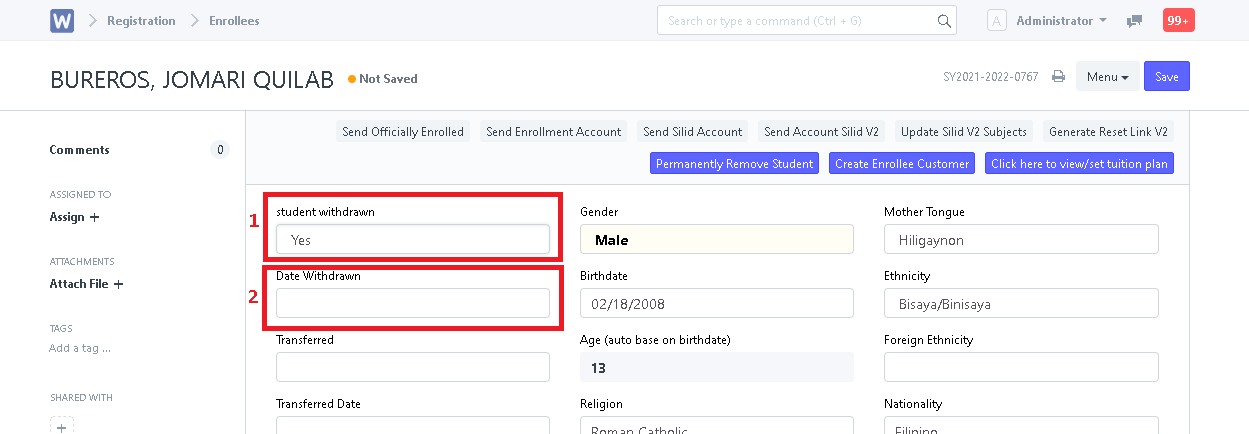
Step 1. Go to Enrollees. Find the student's enrollees entry and open it.


Step 2. In the "Student Withdrawn", select "Yes" then input date withdrawn. Then click "Save".